This is a short video on how we assembled the KURA bed by IKEA. I have to admit, it took a while to set everything up, but once you know order of the parts then its easy. Definitely use the extension tool included in the kit to make it easier and quicker.
Showing posts with label room. Show all posts
Showing posts with label room. Show all posts
Thursday, January 2, 2014

Monday, November 11, 2013
Ikea hack the kura bed... The beginning of this project.
The Kura bed project:
Yesterday, we went to ikea and purchased the Kura bed. We had seen this bed on our last trip to ikea and knew it had potential. Then, on one of those Pinterest nights I found our new project....

Over the next few weeks I will keep everyone posted on the progress of this project. I have to admit we are just going by this image for instructions. My husband will have to figure out everything as he goes.
First, since we are out of garage space and we live in a two story house. We have decide to build the bed in my sons room and add pieces to the bed there. I have to admit building is the easy part; painting will definetly be a challenge.
Wish us luck, we need this bed done ASAP.
We have another baby on the way who needs my son's crib :)
Wednesday, October 30, 2013
Ikea RAM picture frame makeover - love the way it looks !!
We've been getting the house ready for the birthday party. I have to admit, some projects aren't a necessity but I love the motivation ! I had these old ikea picture frames in the garage, just waiting to be painted. So, after years of waiting they are finally put to good use :)
Summary of steps:
1. Painted the frame and the cardboard insert to match my son's room.
2. Used artwork my cousin did when she was a small child. Cut artwork to fit.
3. Hanged on the walls
So easy, I wish I would have done it sooner.

Before:
After:
Tuesday, October 15, 2013
The floating bookshelves are finally done !!
Its been months since we started this project. First, we didn't know what we were doing so we only made 2 shelves. Now, we've added the last 2. I plan on putting art work at the very top. I'm working on a you tube video on how we made and installed the bookshelves. Hope to finish it soon :) here are some pictures of the finished product.


Friday, August 30, 2013
Playroom Mural...Is it almost done ?
It's been a while since I updated the work my husband has done on the mural. It seems every week we get a little closer to finishing it. There is still some tree and grass details that need to be added. We are contemplating adding a lion, unfortunately we need to start cleaning out the garage and the mural has taken us a couple of months already. Seems like this is how it's going to stay for a while, that garage isn't going to organize itself.

Monday, August 5, 2013
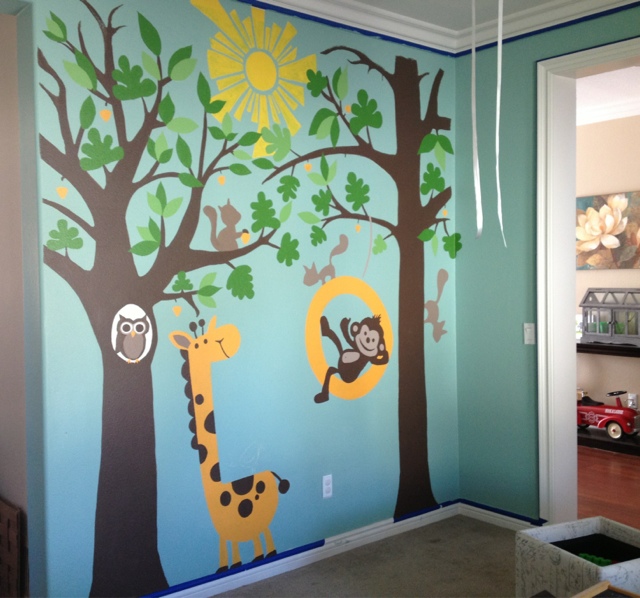
Playroom mural - half way finished !!
This past weekend my husband painted the edges of the wall and an adjoining wall. It makes the mural look amazing ! While we still have an elephant, monkey, birds, bird nest and a lion. It's looking awesome :)
Wednesday, July 31, 2013
Play Room Mural ... Hooray !!
 There is still a lot of work to do on our mural but so far so good :) We have spent $15 total in paint samples and paint brushes. More than anything you need time and commitment. There is still a giraffe, monkey, elephant, fox and birds to add. My husband has done an awesome job. I wish I could help but the paint smell still makes me sick. So hopefully in the next couple of weeks we can mark this project complete.
Our next home project will be the garage, heaven help us, its chaos in there !
Sunday, July 28, 2013
Painting a wall mural (update)
My husband has been able to make some progress on the mural today. The details that need to be added take time, since the chalk outline is only an simple aid.Its easy in a way, kind of like a coloring book just in a larger scale.


Subscribe to:
Posts (Atom)